







How to Share iCloud Calendar: iPhone, Mac & Web 2026
Learn how to share iCloud Calendar on iPhone, Mac, or web. Discover private invites, public links, and how to sync with non-Apple users in 2026.
You’re probably dealing with this right now. Your appointments live in Apple Calendar on your iPhone, your client sends invites through Google Calendar, and someone else in the mix uses Outlook because that’s what their company issued. You just want everyone to see the right schedule without turning your calendar into a public notice board.
That’s the main challenge behind how to share iCloud Calendar. Inside Apple’s world, it’s smooth. You can invite people, control whether they can edit, and keep everything synced across Apple devices. The friction starts when the other person isn’t using iCloud.
That’s where most guides get too casual. They’ll tell you to flip on Public Calendar, copy a link, and move on. What they often skip is the privacy trade-off. A public link is easy, but it’s not the same as controlled sharing. If your calendar includes client names, appointment details, locations, or private family events, that distinction matters.
The Challenge of Sharing Calendars in a Mixed-Tech World
A shared calendar sounds simple until real life gets involved.
One person has an iPhone and a MacBook. Another uses Android and Google Calendar. A third person works from Outlook because their employer locks everything into Microsoft 365. The meeting still has to happen, the kids still need pickup, and the doctor’s appointment still needs to be visible to the right people.
Apple makes the Apple-to-Apple part easy. If both people use iCloud calendars, private sharing works well for day-to-day coordination. You can invite a specific person and decide whether they can only view events or also edit them. For families, couples, and small teams who all use Apple devices, that’s often enough.
Mixed setups are where people get stuck. The native iCloud method doesn’t behave like a universal sharing system across Google, Outlook, and Android. What looks like a simple share button turns into a decision about access, privacy, and what information you’re comfortable exposing.
Practical rule: If the other person isn’t in Apple’s ecosystem, stop and think about whether you need collaboration, read-only visibility, or just free/busy availability. Those are three different problems.
I’ve seen this trip people up most often in professional settings. Consultants want clients to see availability, not internal meeting titles. Freelancers want to avoid double-booking across personal and client calendars. Families want grandparents to view plans without editing anything. Apple handles some of that cleanly, but not all of it.
The good news is that there is a workable path. You can use Apple’s native sharing where it fits, avoid the privacy mistake many people make with public links, and choose a more controlled sync approach when your schedule crosses platforms.
Understanding iCloud Sharing Permissions and Options
Before you tap any share button, it helps to know that Apple gives you two very different sharing modes. They look similar at first, but they solve different problems, as covered in these iCloud calendar sharing options and settings, and come with very different privacy implications.
Private sharing for Apple users
Private sharing is the preferred method. You invite a specific person to a calendar, and they accept that invitation through iCloud. Apple’s native setup is built for people inside the Apple ecosystem. The sharer and the recipient both need to use iCloud for calendars to accept invites and view shared events in real time, and the recipient must tap Join Calendar in their calendar app inbox after receiving the invitation so the shared calendar syncs across their Apple devices, as shown in Apple-related guidance summarized by this reference on iCloud calendar sharing behavior.
With private sharing, you can usually choose between:
- View only if someone just needs visibility
- View and edit if they should be able to add or change events
That makes private sharing the right fit for a spouse, co-parent, assistant, or teammate who also lives in Apple Calendar. If you need more family-specific ideas around permissions and setup, this guide on sharing a calendar with family is a useful companion.
Public sharing for everyone else
If the other person doesn’t use iCloud, Apple pushes you toward Public Calendar. That creates a shareable link people can subscribe to from other calendar apps. The catch is big: it’s read-only, and anyone with the link can view the calendar. There’s no edit access through this route.
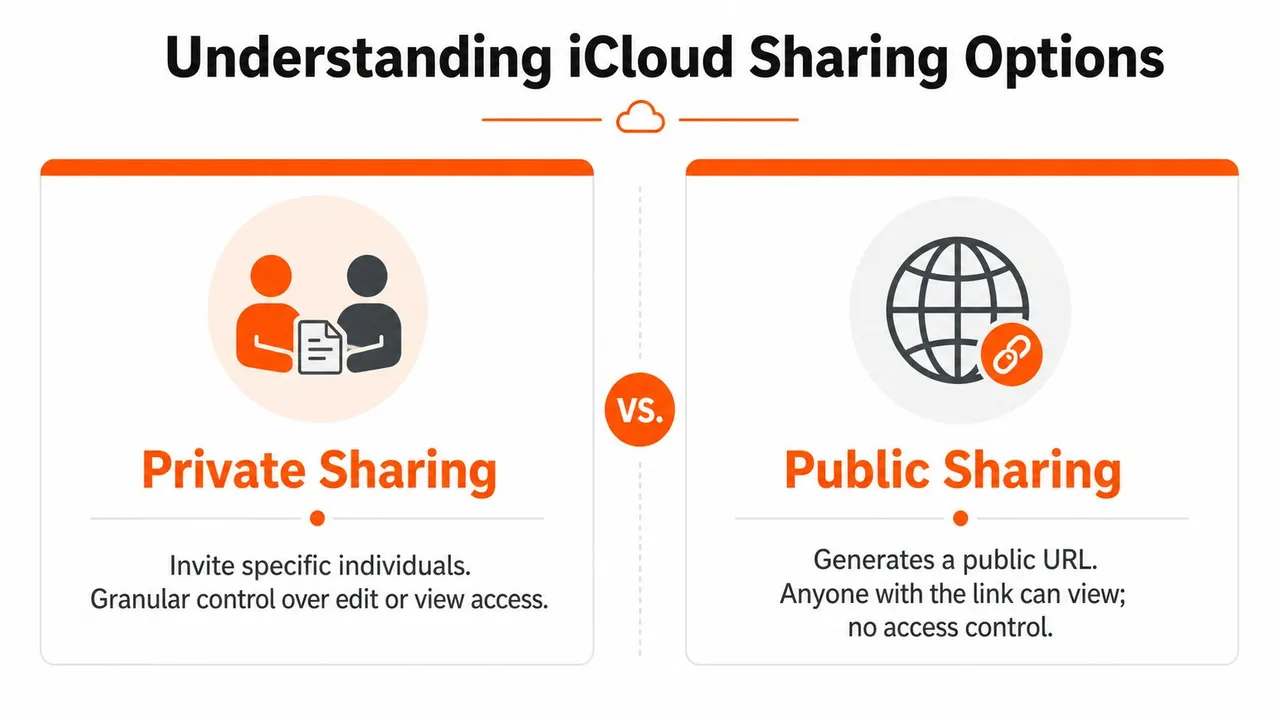
This is the trade-off many guides gloss over. Public sharing is convenient, but it isn’t selective access as commonly understood. It’s closer to publishing a calendar feed.
⚠️ A public iCloud link always exposes full event details - iCloud has no free/busy-only option. If you only want to share availability, see the Apple workarounds in our free free/busy link builder.
Here’s the simplest way to think about it:
| Sharing option | Who it works for | Permissions | Main risk |
|---|---|---|---|
| Private sharing | Apple users on iCloud | View only or view and edit | Limited to Apple ecosystem |
| Public sharing | Anyone with the link | View only | Event details may be exposed to anyone who has the URL |
If your calendar contains sensitive appointment names, client details, or private locations, a public link is usually the wrong tool.
How to Share Your iCloud Calendar Step by Step
The steps depend on where you’re doing the sharing. Apple keeps the process fairly similar across devices, but the buttons sit in different places.
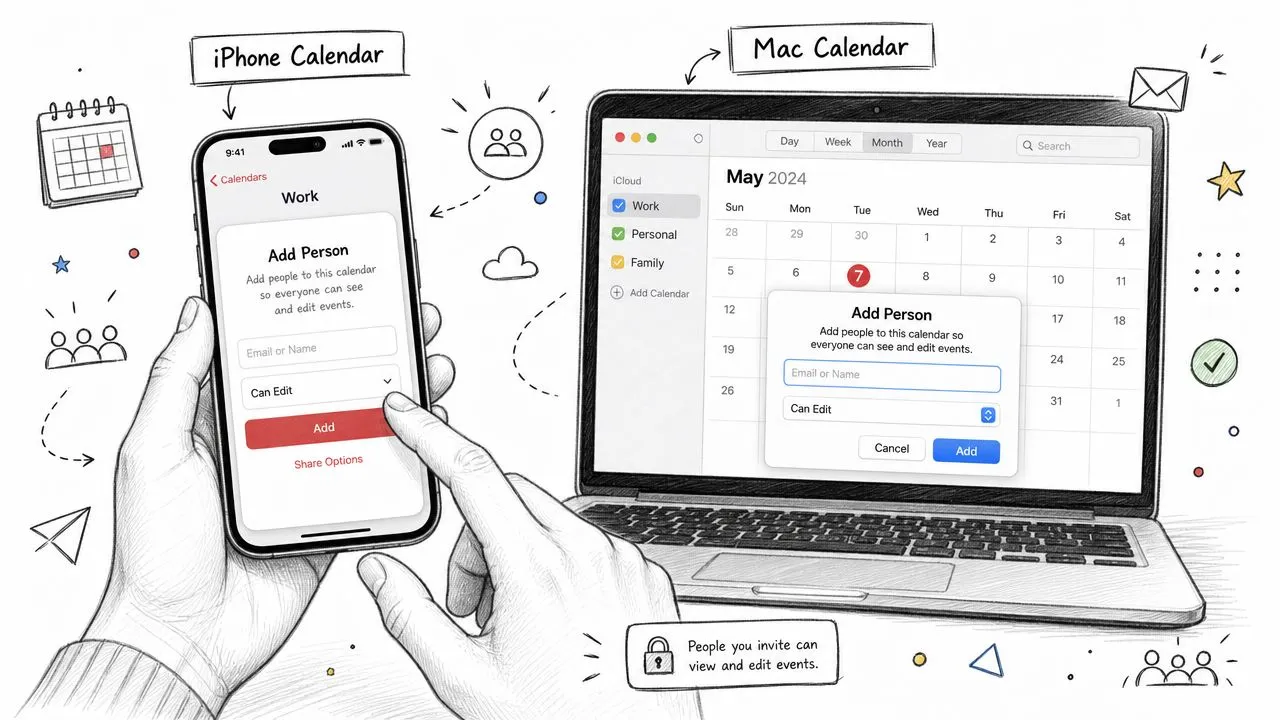
On your iPhone and iPad
If you mostly manage your schedule from your phone, this is the fastest route.
- Open the Calendar app.
- Tap Calendars at the bottom.
- Find the calendar you want to share.
- Tap the info button next to that calendar.
- For private sharing, tap Add Person.
- Enter the Apple ID email address of the person you want to invite.
- Send the invite.
Once they accept, the calendar appears in their Apple Calendar list.
If you want to adjust access after inviting them, open the same calendar info screen, tap their name, and change their permission if that option appears on your device. For a more iPhone-specific walkthrough, this guide on sharing a calendar on iPhone lays out the flow clearly.
For people outside Apple’s ecosystem, the usual path is different:
- Open the same calendar info screen.
- Turn on Public Calendar.
- Copy the generated link.
- Send that link to the person who needs to subscribe.
That’s the step where you should pause and consider what’s inside that calendar.
On your Mac
The Mac version is often easier if you’re managing several calendars or changing permissions for multiple people.
- Open the Calendar app.
- In the sidebar, find the calendar you want to share.
- Hover over the calendar name and click the sharing or info control that appears.
- Add the person’s Apple ID for private sharing.
- Confirm the invitation.
For public sharing, you’ll usually see an option to enable Public Calendar and reveal the subscription link.
A practical tip from years of helping people sort this out: keep separate calendars for separate audiences. One calendar for family logistics. One for client calls. One for personal appointments. That way, if you must use a public link, you aren’t exposing your entire schedule.
A separate walkthrough like Fluidwave’s shared calendar setup tips can also help if you’re deciding how to organize calendars before you start sharing them.
Using iCloud.com in a web browser
If you’re on a Windows PC, borrowed machine, or just prefer the browser, iCloud.com still gets the job done.
- Go to iCloud.com and sign in.
- Open Calendar.
- Select the calendar you want to share.
- Click the share or info control for that calendar.
- Add a person for private sharing, or enable the public option if you need a subscription link.
This method is handy when you don’t have your Apple device nearby, but the same limitations still apply. Private invites are for iCloud users. Public links are for broader access, but they’re read-only.
If you want to watch the process instead of reading steps, this walkthrough is useful:
Which method to choose
If you’re deciding fast, use this rule of thumb:
- Use private sharing when both people use Apple Calendar and you want controlled access.
- Use a public link only when the calendar is safe to expose in read-only form.
- Don’t use your main calendar as the one you publish externally.
Keep a dedicated share-safe calendar if you need outside visibility. It saves a lot of cleanup later.
👉 To display an iCloud calendar inside Google Calendar or Outlook, our free add one calendar to another tool gives you the exact steps for any provider pair.
Managing Who Can See Your Calendar and How to Stop Sharing
Calendar sharing isn’t a set-it-and-forget-it feature. Projects end. Relationships change. Contractors roll off. Kids age into different levels of access. You should know how to remove access as easily as you granted it, especially if you understand how shared iCloud calendars behave for participants.
Change permissions for a private share
On iPhone or iPad, open Calendar, tap Calendars, then tap the info button next to the shared calendar. From there, tap the person’s name to review what they can do.
On Mac, open Calendar, find the shared calendar in the sidebar, and open its sharing settings. You can review the people attached to that calendar and update access where Apple gives you that option.
The safest habit is simple:
- Start with view-only when someone only needs visibility
- Use edit rights sparingly for people who actively manage the schedule
- Review older shares every so often so forgotten invites don’t linger
Remove a person from a shared calendar
If someone no longer needs access, remove them directly from the same sharing panel. On iPhone, that means opening the calendar info screen and selecting the person. On Mac, it means opening the calendar’s sharing settings and removing their name.
Once removed, they won’t continue seeing updates from that shared calendar.
Turn off a public calendar link
Public links deserve extra attention because they’re easy to forget. If you enabled Public Calendar, go back to that calendar’s settings and switch the public option off. That deactivates the shared link.
Security habit: If you created a public link for a temporary reason, turn it off as soon as that reason is gone.
If a public calendar has been in use for a while, it’s also smart to review what events were placed on it. In many cases, the better move is to stop sharing that calendar and create a cleaner one for future external visibility.
Troubleshooting Common iCloud Sharing Problems
Most iCloud calendar issues come down to identity, sync state, or permission mismatch. When sharing fails, work through the basics before assuming Apple broke something.
The invite never arrived
Problem: The person says they never received the calendar invitation.
Solution: Verify that you used the email address tied to their Apple ID. Then ask them to check the Calendar app inbox, not just their email inbox. Apple’s sharing flow relies on the in-app acceptance step for private shares.
The calendar isn’t updating
Problem: You shared the calendar, but changes don’t appear on the other device.
Solution: Confirm both devices are connected to the internet and that Calendar syncing is enabled in iCloud settings. Then refresh the Calendar app and reopen it.
The person can see events but can’t edit
Problem: They expected to collaborate, but the calendar is read-only.
Solution: Check which sharing method you used. If you shared via a public link, editing isn’t available. If you used private sharing, review that person’s permission settings.
Accepting the invite fails
Problem: The recipient taps the invitation but the calendar doesn’t join properly.
Solution: Make sure they are signed into the right Apple account and using iCloud for calendars. If needed, remove the pending share and resend the invitation.
Nothing works consistently
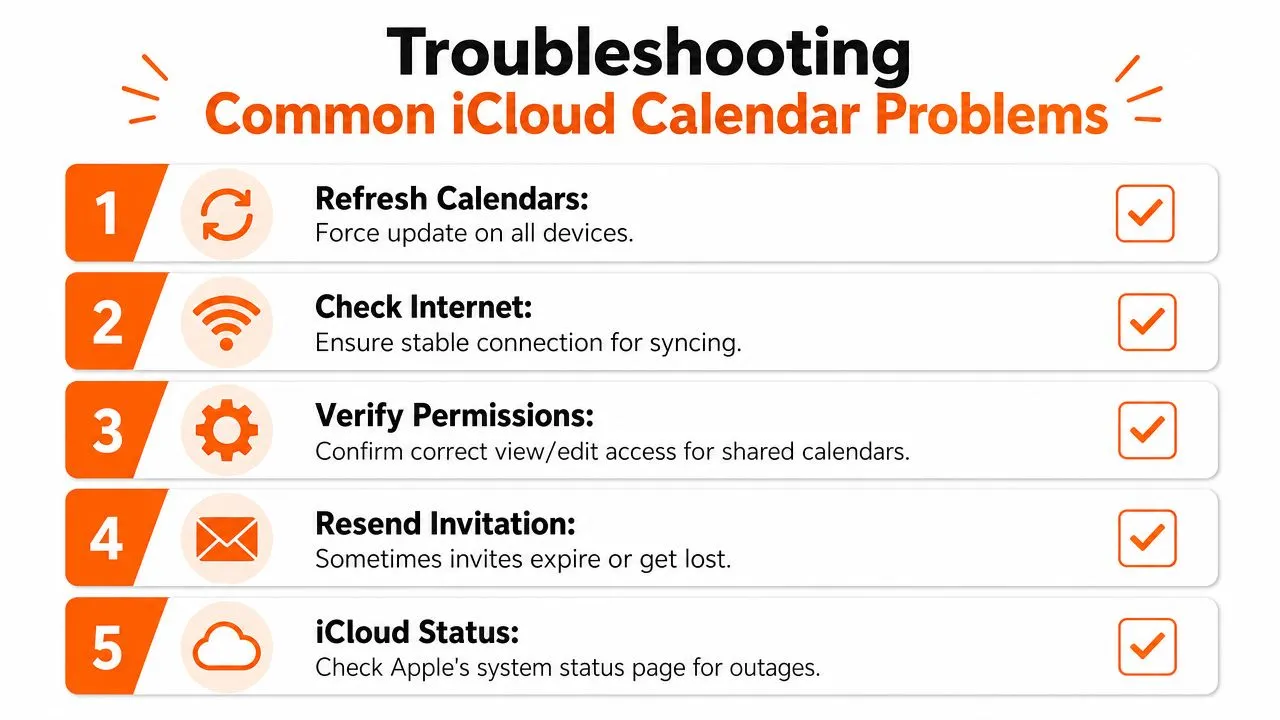
Use this checklist in order:
- Check the Apple ID used for the invite
- Open the Calendar inbox and look for the pending request
- Confirm iCloud Calendar is enabled on the device
- Resend the invitation instead of waiting
- Check Apple’s system status if syncing seems broadly delayed
Sometimes the cleanest fix is to remove the share and create it again from scratch. That’s faster than chasing a broken invitation.
A Better Way to Sync Calendars Across Platforms
If all your sharing happens between Apple users, the native tools are usually fine. The problem starts when you need to coordinate availability across iCloud, Google Calendar, and Outlook without exposing event details.
Apple’s official documentation doesn’t offer a native one-way free/busy only export from iCloud to Google or Android, and the public-calendar workaround creates a privacy gap for professionals who need to show availability without revealing sensitive meeting details. That limitation matters even more because over 60% of remote teams use mixed calendar ecosystems, according to the verified data tied to Apple’s iPhone calendar guidance.
That’s the practical dividing line. Sometimes you don’t want to share a full calendar. You want to block off time on another platform so you don’t get double-booked. That’s not the same as publishing your events.
What a sync tool solves
A cross-platform sync tool handles a different job than Apple’s native share feature.
Instead of inviting someone into your iCloud calendar or publishing a public link, a sync service can:
- Mirror free/busy status across calendars
- Keep work and personal calendars aligned
- Limit or mask copied event details
- Support one-way or two-way flows depending on how you work
That’s useful for consultants juggling client calendars, sales teams booking from multiple accounts, and anyone who wants Outlook or Google to reflect iCloud availability without handing over private event content.
One option in this category is SyncThemCalendars, which synchronizes events between Google Calendar, Microsoft Outlook/Office 365, and Apple Calendar in real time, with support for one-way, two-way, or multi-way sync and free/busy mirroring. That makes it a different tool from native iCloud sharing. It’s for schedule alignment across platforms, not just invitation-based sharing inside Apple’s ecosystem.
When this approach makes more sense
You’ll usually want sync instead of native sharing if any of these are true:
- You manage several accounts: personal iCloud, client Google Calendar, and company Outlook
- You need privacy: others should see you’re busy, not why
- You need automation: manual copying between calendars doesn’t hold up
- You work in mixed environments: Apple, Google, and Microsoft all show up in the same week
If your scheduling problems extend beyond calendar visibility into staffing and operations, this guide on how to streamline team scheduling with AI adds useful context on the broader planning side.
If Apple’s built-in sharing is too limited for the way you work, SyncThemCalendars is worth a look. It’s a web-based way to keep iCloud, Google Calendar, and Outlook aligned in real time while controlling how much event detail gets copied. For anyone balancing multiple calendars and trying to avoid both double-bookings and oversharing, that’s often the cleaner setup.
Ready to sync your calendars?
Keep your Google, Outlook and Apple iCloud calendars in sync automatically. 2-minute setup, no credit card required.
Get started freeKeep reading
More in Tutorials
How to Add Gmail Calendar to Outlook Without Duplicates
See how to add Gmail Calendar to Outlook by subscribing for a live view or using two-way sync, then avoid privacy leaks and duplicate events.
Export Outlook Calendar to Google: A 2026 Step-by-Step Guide
Learn how to export Outlook calendar to Google with clear steps for ICS and CSV imports, recurring-event checks, and verification tips that work in 2026.

How to Synchronize Outlook Calendar Across Platforms
Learn how to synchronize Outlook calendar events with Google and Apple iCloud. Master two-way sync, privacy controls, and real-time availability mapping.