How to Share a Calendar Event on iPhone: A Quick Guide
Need to share a calendar event on iPhone? Our 2026 step-by-step guide covers inviting people, setting permissions, and troubleshooting common issues.
You’ve probably done this dance already. You text the time for dinner, someone asks for the address, another person says “can you send me the invite,” and now the details live in three places with no clear RSVP trail.
That’s where the iPhone’s built-in Calendar app is useful, if you use the right sharing method. If you want to share a calendar event on iPhone and have people accept, decline, or see updates without chasing them down, you need to send a real invite, not a screenshot and not a forwarded note.
Your Guide to iPhone Calendar Sharing
A lot of people think “sharing” a calendar event means tapping the Share button and tossing it into Messages. That works if your only goal is to send information. It does not work well if you want clean RSVPs, update tracking, or a reliable record of who saw what.
Apple has been building this into Calendar for a long time. The ability to send meeting and event invitations directly from the iPhone Calendar app started with iOS 5 in 2011, and by 2026 Apple says the feature supports iCloud, Microsoft Exchange, and CalDAV accounts, while also noting that “not all calendar servers support every feature” (Apple calendar invitation history and support details). That last part matters more than most quick tutorials admit.
For families, the native workflow is already mainstream. As of 2026, Apple reports that approximately 68% of U.S. parents with school-age children use Apple Calendar sharing daily for schedules, school events, and activities (Apple family calendar usage data). That tells you something simple. For basic coordination, the feature is no longer niche.
Still, there’s a gap between “it exists” and “it works the way you expect.” Sharing one event with another iPhone user is usually smooth. Sharing with a Gmail or Outlook user can get messy. Sharing your availability without exposing private event details is a separate problem entirely.
If you’re trying to coordinate family plans regularly, a dedicated shared calendar often works better than one-off invites. This guide on calendars to share with family is useful if your scheduling headaches are happening every week, not just for one event.
Practical rule: If attendance matters, send an invite from inside the event. If awareness is enough, a plain shared copy can be fine.
How to Invite People to a Calendar Event
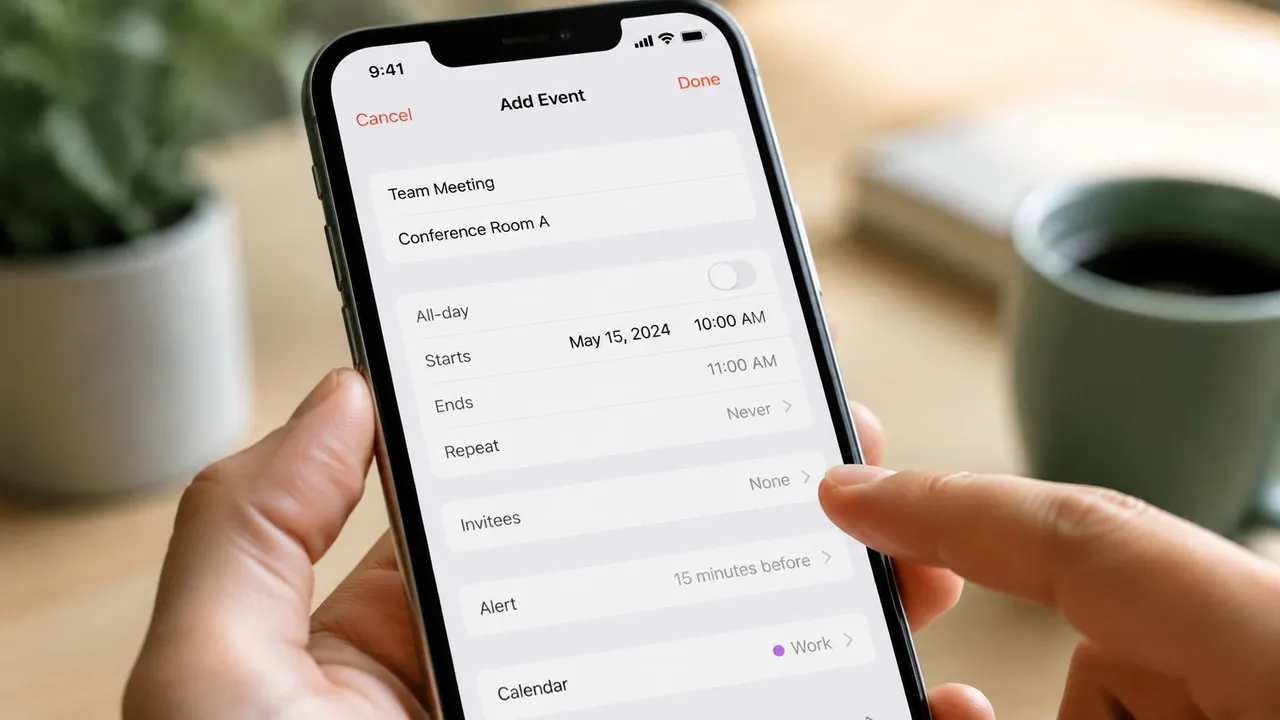
The cleanest way to share a single event is through the Invitees field inside the event editor. That’s the method that turns your event into a live invitation instead of a static file.
The method that actually tracks responses
Open Calendar on your iPhone, tap the event, then tap Edit. Scroll until you see Invitees. Add people using an email address or phone number, then tap Done. When iPhone asks whether to send invitations, confirm it.
That workflow matters because it sends an active invite, not just a copy of event details. When the invitation goes out properly, you can check whether someone accepted, declined, or hasn’t responded yet.
Here’s the step flow in a compact version:
- Open the event you want to share.
- Tap Edit in the top-right corner.
- Find Invitees and add recipients.
- Tap Done and send the invitation when prompted.
Why the Share button often disappoints
The confusing part is that iPhone also gives you ways to “share” an event outside the Invitees field. If you use the native Share option through Mail or Messages, Apple says that usually sends a .ics attachment rather than an active iCloud invitation (single-event sharing details and .ics limitation).
That difference is easy to miss, but it changes the outcome:
| Method | What recipient gets | RSVP tracking |
|---|---|---|
| Invitees field | Live calendar invitation | Yes, status can sync back |
| Share button | Usually an .ics attachment | No, not in the same way |
Apple’s support telemetry says that if the event was created by someone else, the Invitees field is often disabled, a common pitfall affecting approximately 18% of users in collaborative corporate environments (owner-permission limitation in shared events). So if Invitees is grayed out, the problem usually isn’t your phone. It’s permissions.
If you can’t tap Invitees, check who owns the event before you waste time troubleshooting notifications.
A short walkthrough can help if you want to see the taps in motion:
What works best in practice
Use the Invitees field when you want any of these:
- RSVP visibility so you can tell who’s coming
- Automatic updates when time or location changes
- Cleaner guest experience than texting details separately
Skip the Share button for anything that requires accountability. It’s fine for forwarding information. It’s weak for managing a real event.
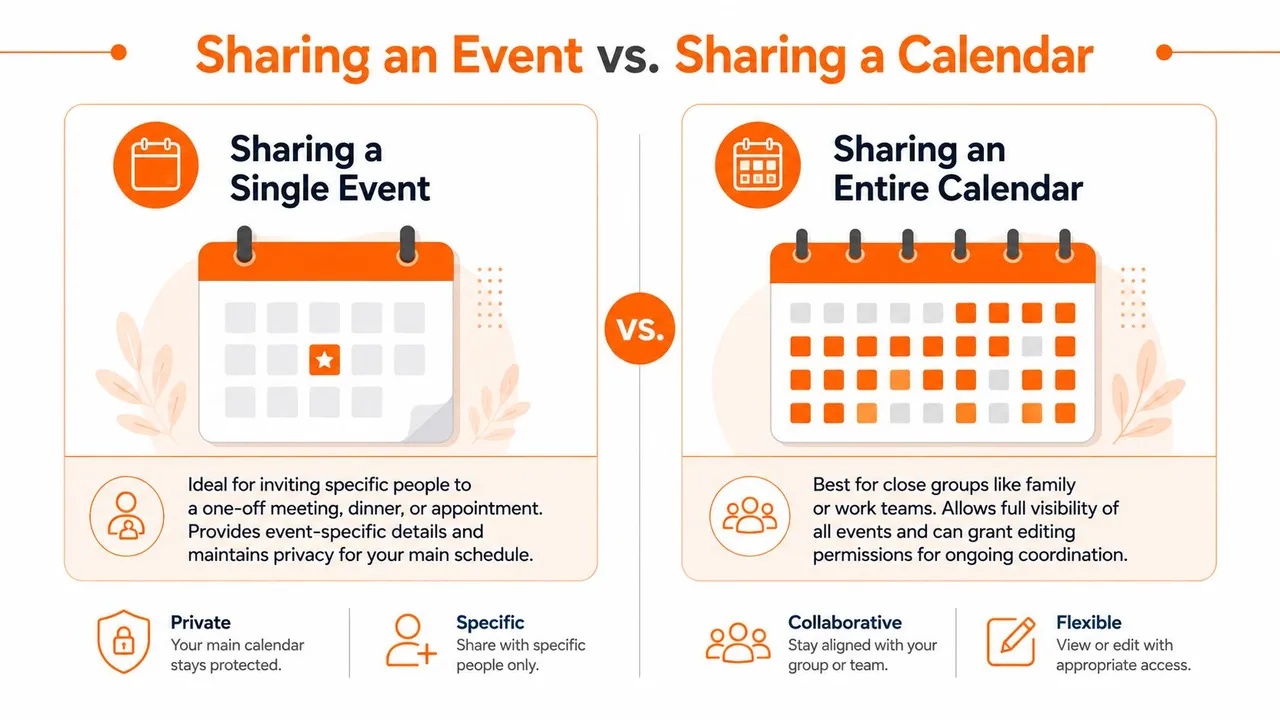
Sharing an Event vs Sharing a Calendar
💡 Sharing an event with people on different calendar apps? Our free “Add to Calendar” link generator turns any event into one-click links for Google Calendar, Outlook and Apple Calendar, no invitation needed.
These are not the same thing, and mixing them up causes half the privacy mistakes people make in Apple Calendar.
A single event invite is for one meeting, one dinner, one appointment. A shared calendar is for ongoing visibility across many events. If you need recurring coordination with a partner, household, or small team, sharing the full calendar is usually the better tool.
When a single event is enough
Choose an event invite when:
- The event is one-off such as a consultation or birthday dinner
- The guest doesn’t need your broader schedule
- You want to keep control of the event details while collecting RSVPs
In this setup, you’re inviting someone to one item, not giving them a window into your week.
When a full calendar makes more sense
To share an entire iCloud calendar on iPhone, open Calendar, tap Calendars at the bottom, hit the info (i) button beside the calendar, then use Add Person. From there, you can give someone View Only or View & Edit access.
That’s useful for families, co-planning, and repeated coordination where separate invites would get annoying fast. If you’re trying to avoid overlap between multiple calendars, this guide on calendar synchronization to share your calendars and avoid double bookings is a good next step.
The privacy setting people miss
The dangerous option here is Public Calendar. Apple’s documentation makes calendar sharing easy, but this one setting changes the security picture fast. If you enable Public Calendar, it creates a shareable URL that can expose the calendar without the tighter controls used by direct person-to-person sharing.
That risk shows up in 32% of Apple enterprise security audit findings regarding data leakage (public calendar security risk). The safe default is simple. Use Add Person for named recipients. Leave Public Calendar off unless you have a very specific reason to use it.
A shared calendar should be intentional. If you wouldn’t post the link in a group chat, don’t turn on Public Calendar.
Managing Invitee Responses and Permissions
Once the invite is sent, the useful part of Apple Calendar kicks in. Open the event again and look at the Invitees area. You’ll usually see response status grouped there, so you can tell who accepted, who declined, and who still hasn’t replied.
How to check responses
The fastest way is this:
- Open the event from Calendar
- Tap into Invitees or attendee details
- Review each person’s status rather than relying on your email inbox
That’s much cleaner than piecing together replies from text messages and email threads.
Who can change what
For a single event invite, guests generally respond with attendance status. They don’t typically get to rewrite the time, move the location, or alter the structure of your event. That keeps the organizer in charge.
For a shared calendar, permissions matter more. If you give someone View & Edit, they can change events on that calendar and those edits can sync across everyone using it. If you only want visibility, keep them on View Only.
A good rule is to treat edit rights like document editing rights. Give them to the small group that needs them, not to everyone who wants awareness.
Troubleshooting Common Sharing Problems
A lot of guides assume the minute you tap “send,” the event will behave the same way in Apple Calendar, Gmail, and Outlook. It won’t.
The biggest friction point is cross-platform sharing. Verified data shows that 42% of cross-platform event invites are rejected due to technical friction (cross-platform invite rejection data). That’s the part most tutorials skip, and it explains why your perfectly fine iPhone invite sometimes lands awkwardly for the other person.
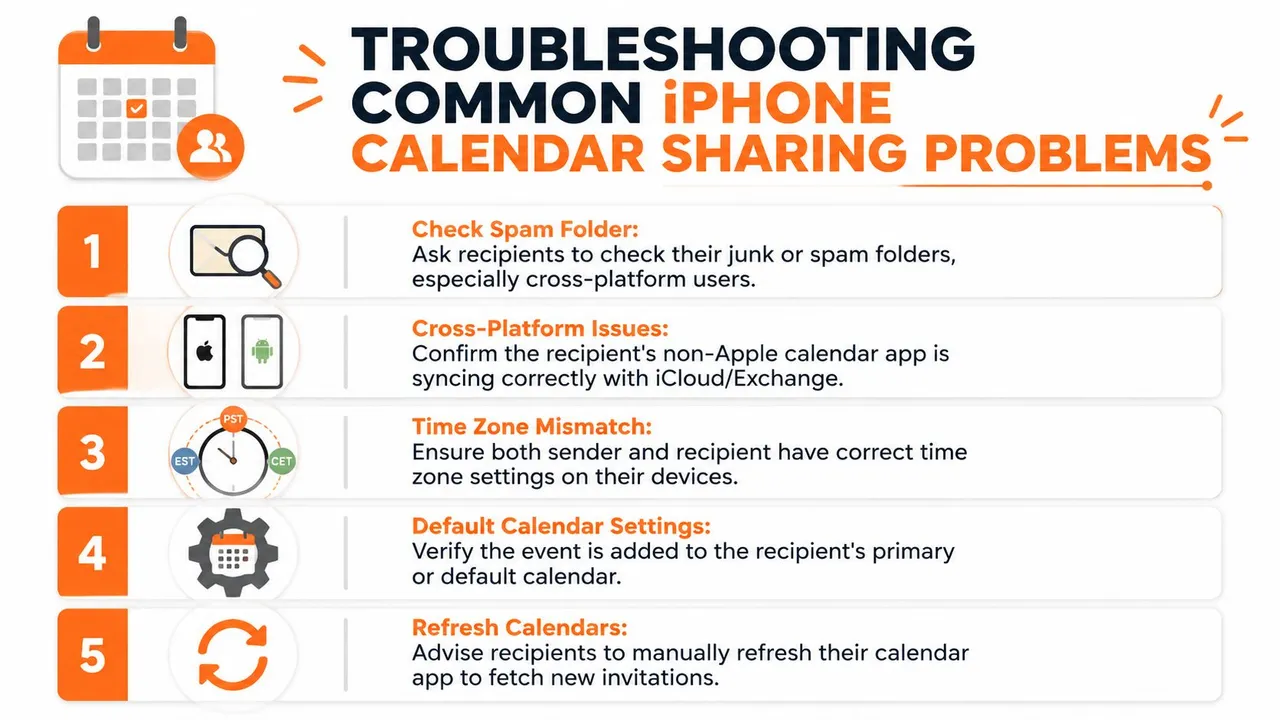
If the recipient says they never got it
Start with the obvious checks first:
- Ask them to check spam or junk if the invite went to email
- Confirm the address you typed in Invitees is the one tied to their working calendar account
- Have them refresh their calendar app if they use Gmail or Outlook on mobile
These sound basic, but they solve a lot of misses.
If Gmail or Outlook users can’t RSVP properly
This is a point of annoyance. Sometimes the recipient gets an email that looks like an invite but doesn’t display Accept / Maybe / Decline cleanly in their app. Other times they get a calendar file that imports, but status doesn’t flow back the way an Apple user expects.
When that happens, these fixes are worth trying:
| Problem | Likely cause | Best move |
|---|---|---|
| No RSVP buttons | Cross-platform rendering issue | Have them open the invite in their main calendar client |
| Wrong time shown | Time zone mismatch | Check time zone settings on both devices |
| Invitees field is grayed out | You don’t own the event | Ask the original creator to add guests |
The permission problem that looks like a bug
If the Invitees field is disabled, users often assume iPhone Calendar is broken. Usually it isn’t. The event belongs to another user or another shared calendar where you don’t have owner-level control.
That means there’s no setting on your phone to modify its access. The only practical fix is to ask the original organizer to add the new person or create a new event that you own.
Cross-platform failures often aren’t user error. They’re the result of different calendar systems handling the same invite in different ways.
Beyond Single Events Share Availability Not Your Life
👉 Our free free/busy link builder creates a busy-only availability link that shows when you’re free, never what you’re doing.
Manual event sharing works when you occasionally need to invite someone. It starts breaking down when your real problem is broader than one event. A freelancer with an iCloud personal calendar, a client Outlook calendar, and a Google booking calendar doesn’t just need invites. They need their availability to stay aligned.
That’s also where privacy becomes a real concern. Verified data says 58% of remote workers and consultants fear privacy breaches when sharing calendar events, and 90% of tutorial content lacks a step-by-step on field masking or read-only sharing for specific guests (privacy concerns in calendar sharing). That concern is reasonable. Users typically don’t want “Blocked” or “Busy”; they seek to avoid exposing “Therapy,” “Interview,” or “Client dispute call.”
If that sounds familiar, it helps to separate two jobs: sharing a single meeting and managing ongoing availability. The first is what iPhone Calendar already does. The second usually needs a system that mirrors free/busy status across accounts without copying sensitive details. For people comparing scheduling stacks, this roundup of top appointment booking tools is a solid reference point because it shows how booking software fits into a broader workflow.
If your issue is calendar overlap rather than booking pages, learning how to sync multiple calendars is often the more useful move. That’s the difference between sending one invite and keeping your schedule sane every day.
If you want your Apple, Google, and Outlook calendars to stay aligned without exposing private event details, SyncThemCalendars is worth a look. It syncs calendars in real time, supports one-way or two-way setups, and can mirror free/busy status while masking titles, locations, or descriptions so you share availability, not your whole life.
Ready to sync your calendars?
Keep your Google, Outlook and Apple iCloud calendars in sync automatically. 2-minute setup, no credit card required.
Get started freeKeep reading
More in Tutorials
How to Use Invite Calendar iPhone Across All Accounts
Learn how to create, send, and manage invite calendar iphone across iCloud, Google, Outlook. Fix missing invites; keep all calendars synced in 2026.
How to Share iCloud Calendar: iPhone, Mac & Web 2026
Learn how to share iCloud Calendar on iPhone, Mac, or web. Discover private invites, public links, and how to sync with non-Apple users in 2026.
How to Migrate Outlook Calendar to Google: Stay Synced
Effortlessly migrate outlook calendar to google! Discover manual export, continuous sync, ICS imports, and automated tools for a smooth transfer.